
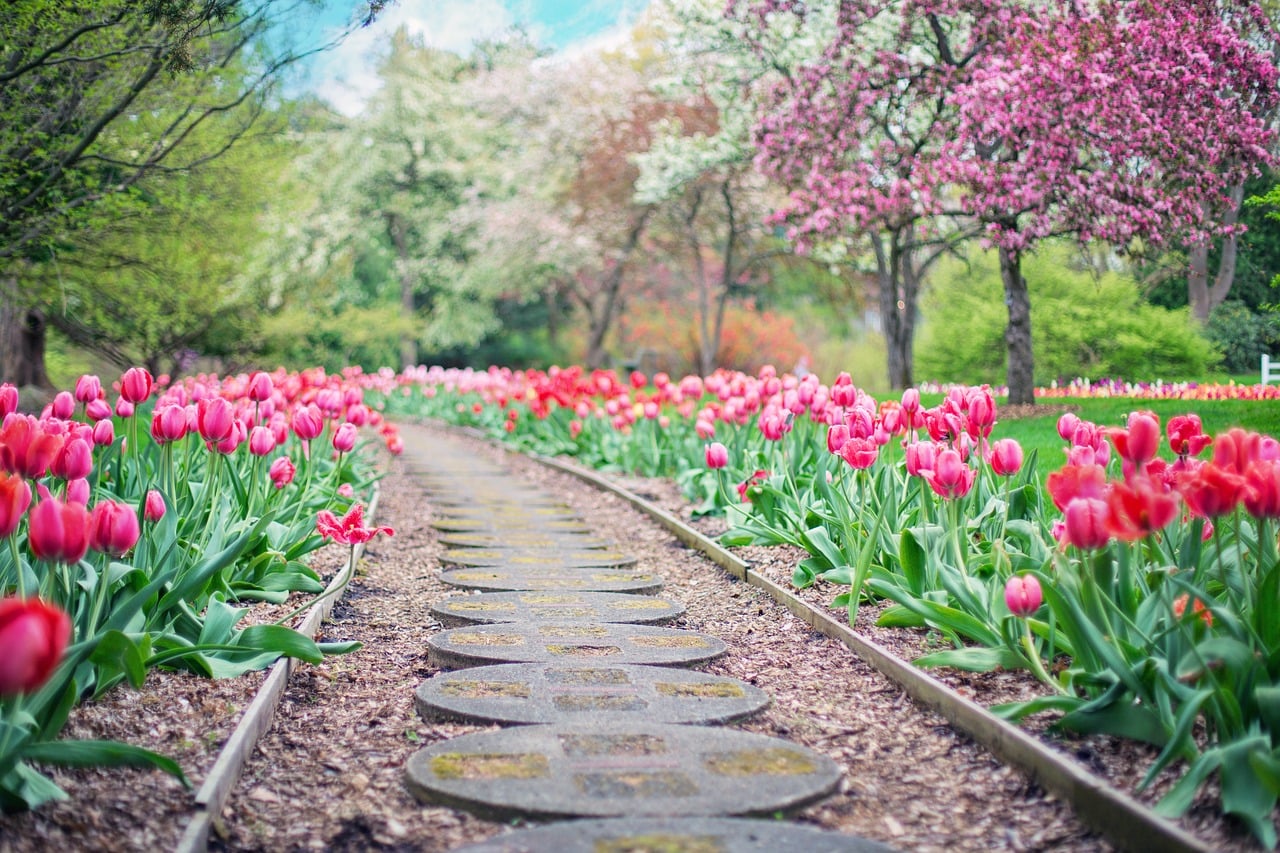
 " data-orig-src="/wp-content/uploads/2019/01/garden-edges.jpg" data-srcset="/wp-content/uploads/2019/01/garden-edges-200x133.jpg 200w, /wp-content/uploads/2019/01/garden-edges-400x267.jpg 400w, /wp-content/uploads/2019/01/garden-edges-600x400.jpg 600w, /wp-content/uploads/2019/01/garden-edges-800x533.jpg 800w, /wp-content/uploads/2019/01/garden-edges-1200x800.jpg 1200w, /wp-content/uploads/2019/01/garden-edges.jpg 1280w" data-sizes="auto" />
 Having well-defined garden edges can make any yard look neat and cared for. No matter how small your outdoor space is, edging definitely provides an aesthetic as well as functional benefits to your landscaping endeavours.
Garden edging can prevent grass from invading your planting bed or vice versa. With properly placed borders, your plants are less likely to be damaged from weeding or mowing processes. Edging also makes it easier for you to manage fertilisation, irrigation, and other chemical applications. In other words, garden edges make it so much easier for you to maintain an aesthetically pleasing yard.
Here are some garden edging ideas to get you started.
Metal Garden Borders
One of the simplest ways to separate your lawn from your garden is to install steel or aluminium borders. Metal bends easily, allowing you to create clean, graceful curves along your garden bed. If you’re going for a simple yet sophisticated vibe, go with metal edging.
Borders made of metal are nothing extravagant, but they get the job done in a very subtle way. Aluminium and steel sheets fade against their natural backdrop while still highlighting your garden beds. These steel borders are also long-lasting.
Metal edging works best on gardens with level terrain. However, if your yard has quite a few dips and rises, it might be best to consider other options.
How to Install Metal Garden Borders
- Step 1: Dig a trench. Make a narrow 4-inch vertical trench along your lawn’s edge using a square spade. You can outline the border with a string or a hose. That should make it easier for you to achieve your desired shape. You can use a circular object as a guide for making sharp curves.
- Step 2: Add the garden edges. Install the steel border into the trench you dug. You should place it against the vertical edge before cutting off the excess parts.
- Step 3: Place stakes. Use stakes as support for your metal borders. Make sure to set a depth of ½ inch. If the edging drops further into the ground as you install the stakes, use a shovel to pry it up.
- Step 4: Add soil. Fill the landscape edging with soil from the garden bed, but leave some space for mulch.
 " data-srcset="/wp-content/uploads/2019/01/brick-garden-edges-20x13.jpg 20w, /wp-content/uploads/2019/01/brick-garden-edges-200x133.jpg 200w, /wp-content/uploads/2019/01/brick-garden-edges-300x200.jpg 300w, /wp-content/uploads/2019/01/brick-garden-edges-400x267.jpg 400w, /wp-content/uploads/2019/01/brick-garden-edges-600x400.jpg 600w, /wp-content/uploads/2019/01/brick-garden-edges-768x512.jpg 768w, /wp-content/uploads/2019/01/brick-garden-edges-800x533.jpg 800w, /wp-content/uploads/2019/01/brick-garden-edges-1024x682.jpg 1024w, /wp-content/uploads/2019/01/brick-garden-edges-1200x800.jpg 1200w, /wp-content/uploads/2019/01/brick-garden-edges.jpg 1280w" data-sizes="auto" data-orig-sizes="(max-width: 1280px) 100vw, 1280px" />
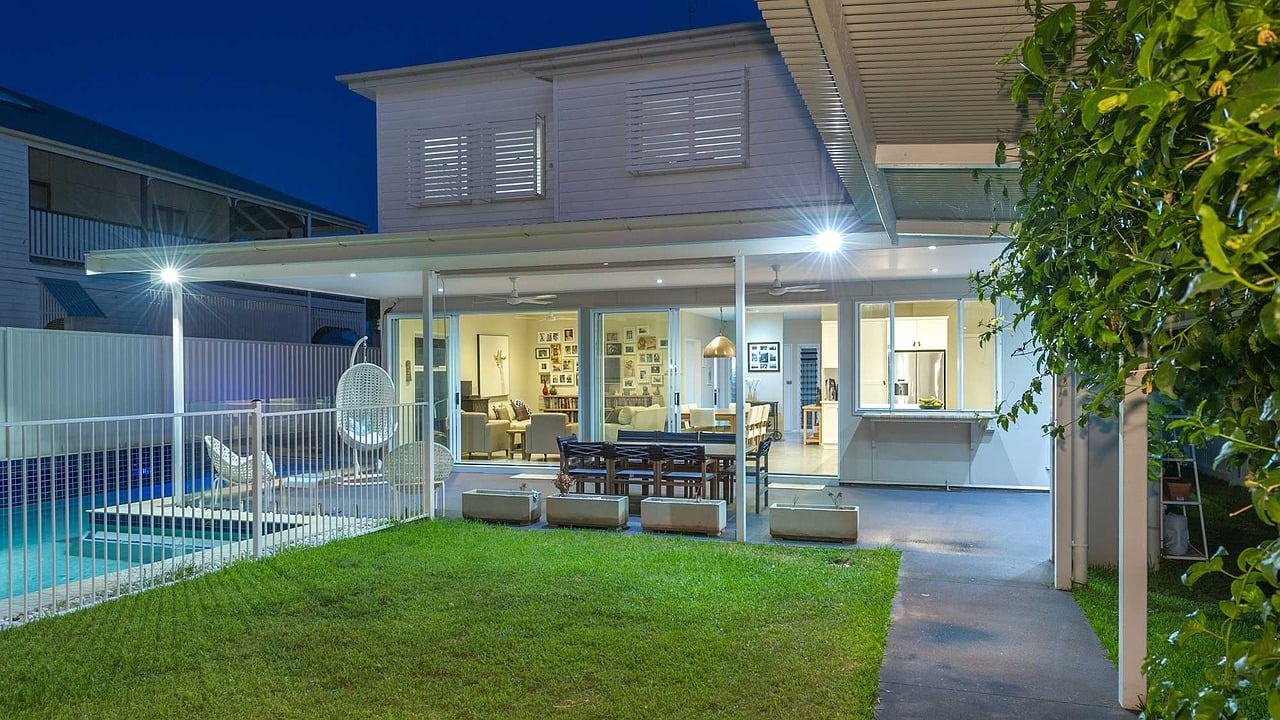
Concrete Edges
Create a polished transition between your lawn and your garden using brick or concrete pavers. They are excellent materials for borders or garden edging. With paver borders, you can keep the grass out of your garden, and let flowers and other plants spill over without actually invading your lawn.
Compared to poured concrete, pavers are less susceptible to cracking. They offer better traction, and they are easy on the eyes. Concrete and brick pavers come in a multitude of style choices. They can work well in formal garden setups for traditional or historic style homes with level terrain. They also look excellent with contemporary designs, even when installed on varying slopes and curves across the landscape.
How to Install Concrete Borders
- Step 1: Mark the edges of the border. Use a garden hose to lay out the edges of your border. You should also use your brick or concrete pavers as guides to ensure that all the curves are gradual and smooth.
- Step 2: Dig a trench. Use a square spade to dig a trench with a 4-inch depth and 1-inch width than your brick or concrete pattern. You should also cut the edges along the grass smooth.
- Step 3: Add fabric and sand. Place a landscape fabric into the trench before adding sand with a depth of 2 inches. This bed of sand should make it easier for you to set your paver borders. Use a block of wood to flatten and smoothen the sand.
- Step 4: Place the edging stones. Set the pavers on the sand. Pack them tightly together so the top and front edges are even. Make sure to set the pavers about ½ inch above the soil.

Raised Flower Beds
Raised flower beds look natural but structured. They can blend in nicely with the environment, but they can also make a bold statement.
Stone is a popular choice of material for raised flower beds. They come in all shapes, sizes, colours and textures. Whether you plan on combining different stones or using the same ones, you can give a featureless yard an interesting character.
Other than its aesthetic benefits, raised flower beds are practical too. They make gardening easier for gardeners with bad backs. If you have poor soil quality, you can fill the raised planting bed with topsoil and compost to create a space for your plants to grow and flourish.
How to Install Raised-Bed Borders
- Step 1: Mark the edges of the border. You can mark your garden border with string, a garden hose or paint.
- Step 2: Dig a trench. Following the outline of the border you made, dig a 4-inch deep trench. Its width will vary depending on your choice of stone. However, it must always be the width of the stone plus 6 inches.
- Step 3: Add gravel. Fill the trench you just dug with gravel. Its height must be at soil level or an inch below it.
- Step 4: Add stones. Set the first layer of stones 4 inches back from the edge of your lawn. Find the ones with the most irregular faces, and place them face down on the gravel. Before adding the next layer, check if your stones are level. You can add more gravel or dig some out to make sure the stones are aligned perfectly.
- Step 5: Add topsoil. Place a sheet of landscape fabric into the raised flower bed before filling it with topsoil.
- Step 6: Install plastic edging. Put in plastic edging 4 inches away from your wall. Add mulch between the plastic and stone.
These are three wonderful garden edging ideas, but the possibilities do not end here. Hopefully, these can inspire you to seek new ways to improve your landscape and grow your garden.


